
Maintaining the accessibility of a large website, and ensuring all its pages remain accessible on different device resolutions can be a challenging task. A change in the layout of a large site affects hundreds of pages, and manually checking the accessibility of each page would be a tedious and error-prone task.
Using automated tests in a continuous integration setup is a great approach to save time and effort. Let's learn how combining Rocket Validator's device viewport emulation and deployment hooks features we can have a powerful and flexible setup to keep the accessibility of our websites in check, covering different device resolutions.
What we’re going to build
In this post we're going to set up a simple continuous integration pipeline for our site.
We'll leverage Rocket Validator's device viewport emulation and deployment hooks features to validate the accessibility of our website on different device resolutions (800x600, 320x568, and 1440x900), and prepare some deployment hooks to integrate our hosting of choice, Netlify, so that they'll trigger the Rocket Validator accessibility reports right after each deployment.
What checks we’ll include
Rocket Validator is a sitewide validation tool that can check thousands of pages from your sites, in search of common accessibility and HTML issues.
The validation reports are pretty simple to set up, as you only need to indicate the starting URL, what checks to include: HTML conformance checking (using the W3C's HTML validator), and/or accessibility checks (using the latest Axe Core's ruleset), and how many web pages to include in the validation report (up to 5,000 per report).
Here's the list of checks that we'll include in our Rocket Validator reports:
- HTML conformance. Ensuring the HTML of our site is compliant with the W3C's HTML validator.
- Axe Core checks at a default 800x600 resolution. Checking the accessibility of our site, in search of common issues such as missing form labels, insufficient color contrast, and more.
- Axe Core checks at a 320x568 resolution. Same Axe Core checks, but this time at a resolution that simulates the screen size of a iPhone SE.
- Axe Core checks at a 1440x900 resolution. Same accessibility checks, at a resolution that simulates the screen size of a HiDPI screen, for example a MacBook Pro.
For each of these validation reports, we'll include up to 100 pages from our test site. So in total, we'll be running 400 validation tests on each deployment, as we'll do 4 checks on 100 pages: an HTML check, and 3 Axe Core checks at 3 different screen resolutions.
Rocket Validator Agency plans include 100,000 validation credits per month, so with an Agency subscription we'll be able to run 250 deployments per month - that's like 8 daily deployments!
Setting up HTML + 800x600 Axe Core validation report
OK, let's get started!
First, we're going to set up a deployment hook that, when triggered, will run a Rocket Validator validation report. This first validation report will include both the HTML conformance check, and the 800x600 Axe Core accessibility checks.
In order to do this, we'll create a new Schedule. In Rocket Validator, a Schedule is a recurring validation report that can be configured to run at a specific time interval, or on demand after receiving a webhook call via your hosting provider or CI/CD service.
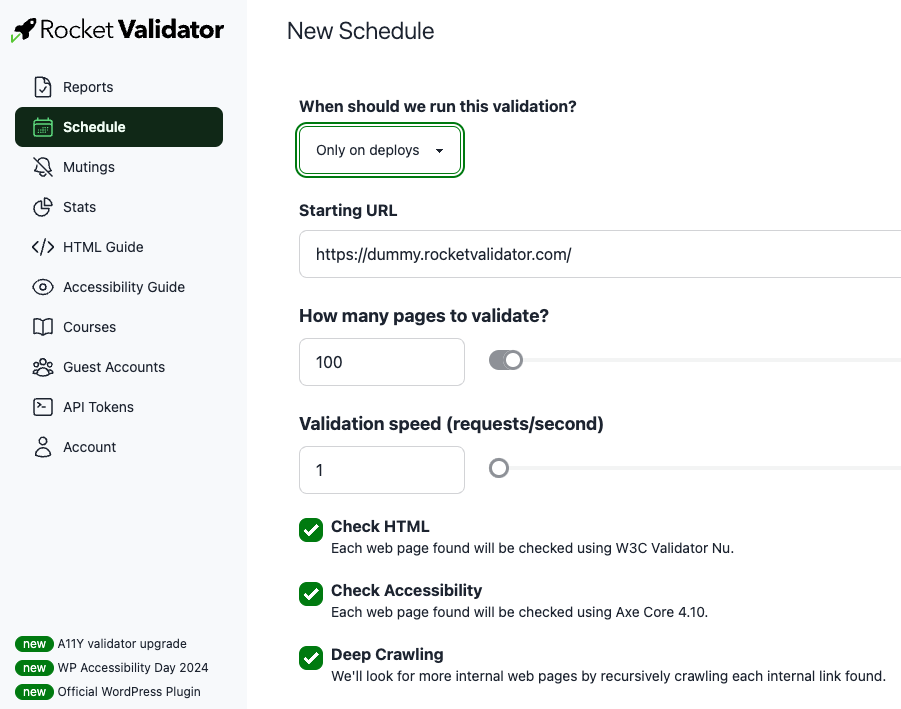
In the New Schedule form, we'll just need to fill in the following fields:
- When should we run this validation? Pick "Only on deploys".
- Starting URL. Enter the homepage of your site, or any URL that you want to start from. In our case we'll use the URL of our dummy test site, https://dummy.rocketvalidator.com/.
- How many pages to validate? We'll use 100 pages for this first validation report.
We'll leave the other fields with its default values. That will include HTML and A11Y checks at a default 800x600 resolution, and other options like Deep Crawling that will let Rocket Validator discover internal links while crawling the site. Also, the lowest validation speed of 1 request per second is a good default for automated validation, to avoid being blocked by the site's rate limits.
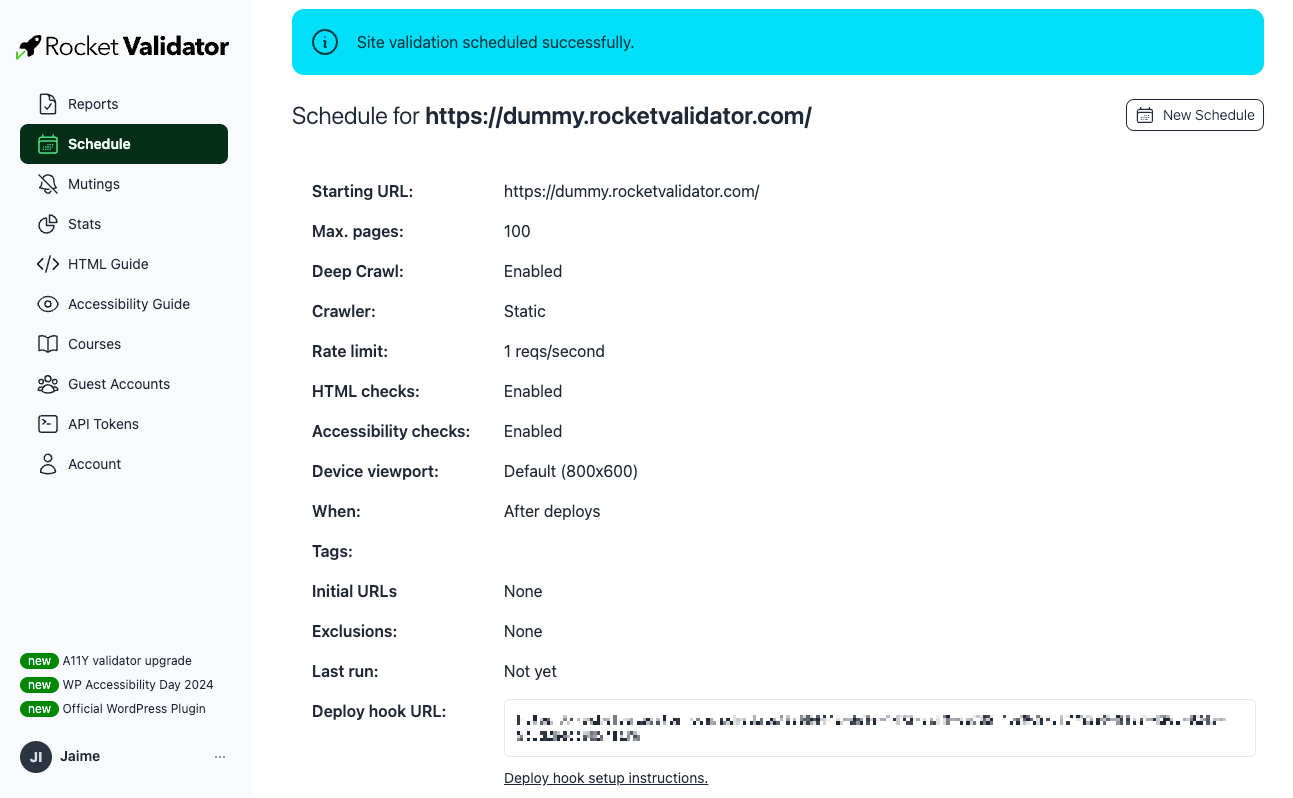
Once we click on Save schedule, we'll see the details of the schedule we just created. This page includes the Deploy hook URL, that we'll need to configure in our Netlify building settings (or in any other CI/CD service that supports webhooks).
Setting up the 320x568 Axe Core validation report
We'll repeat the same process to create a new schedule for the 320x568 Axe Core accessibility validation report.
This time, we'll uncheck the HTML option, as the HTML markup doesn't change between resolutions.
In order to validate the site at a resolution that simulates the screen size of an iPhone SE, we'll check iPhone SE (320x568) in the Device Viewport Emulation section. We can also use the optional tags to categorize these reports, in our example we'll use the "narrow" tag.
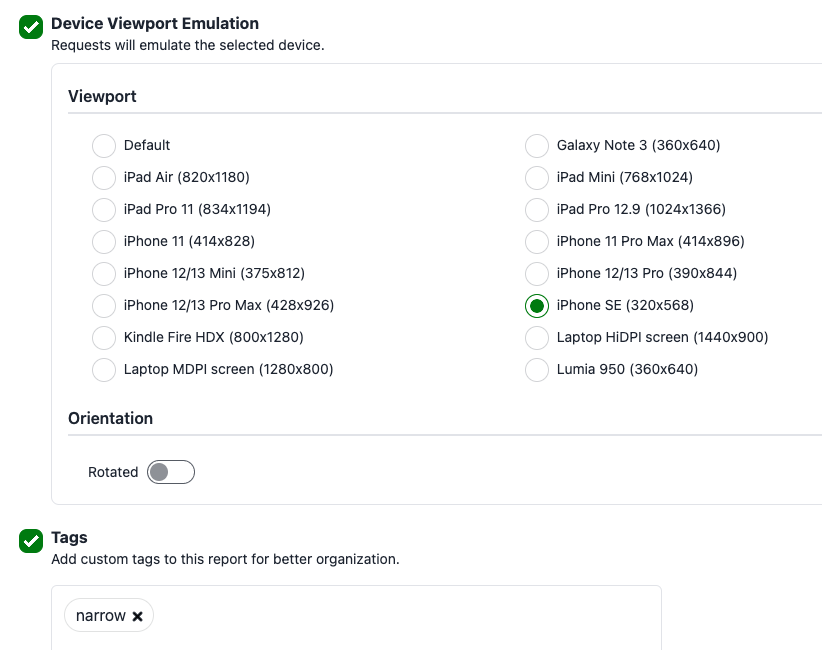
That's all we need! Click on Save schedule and we'll be redirected to the schedule page, where we can see the Deploy hook URL.
Setting up the 1440x900 Axe Core validation report
We'll repeat the same process to create a new schedule for the 1440x900 Axe Core accessibility validation report.
This time, we'll check Laptop HiDPI screen (1440x900) in the Device Viewport Emulation section, and we'll use the "wide" tag.
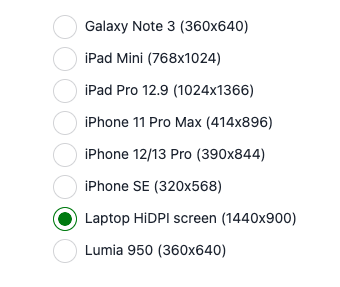
We're almost ready! Save the schedule and you'll get the third Deploy hook URL.
Setting up the Netlify integration
Now that we have the three Deploy hook URLs set up in Rocket Validator, the related reports will be triggered when a POST request is received at the corresponding URL. That's the standard behavior for webhooks, and Netlify makes it very easy to set up.
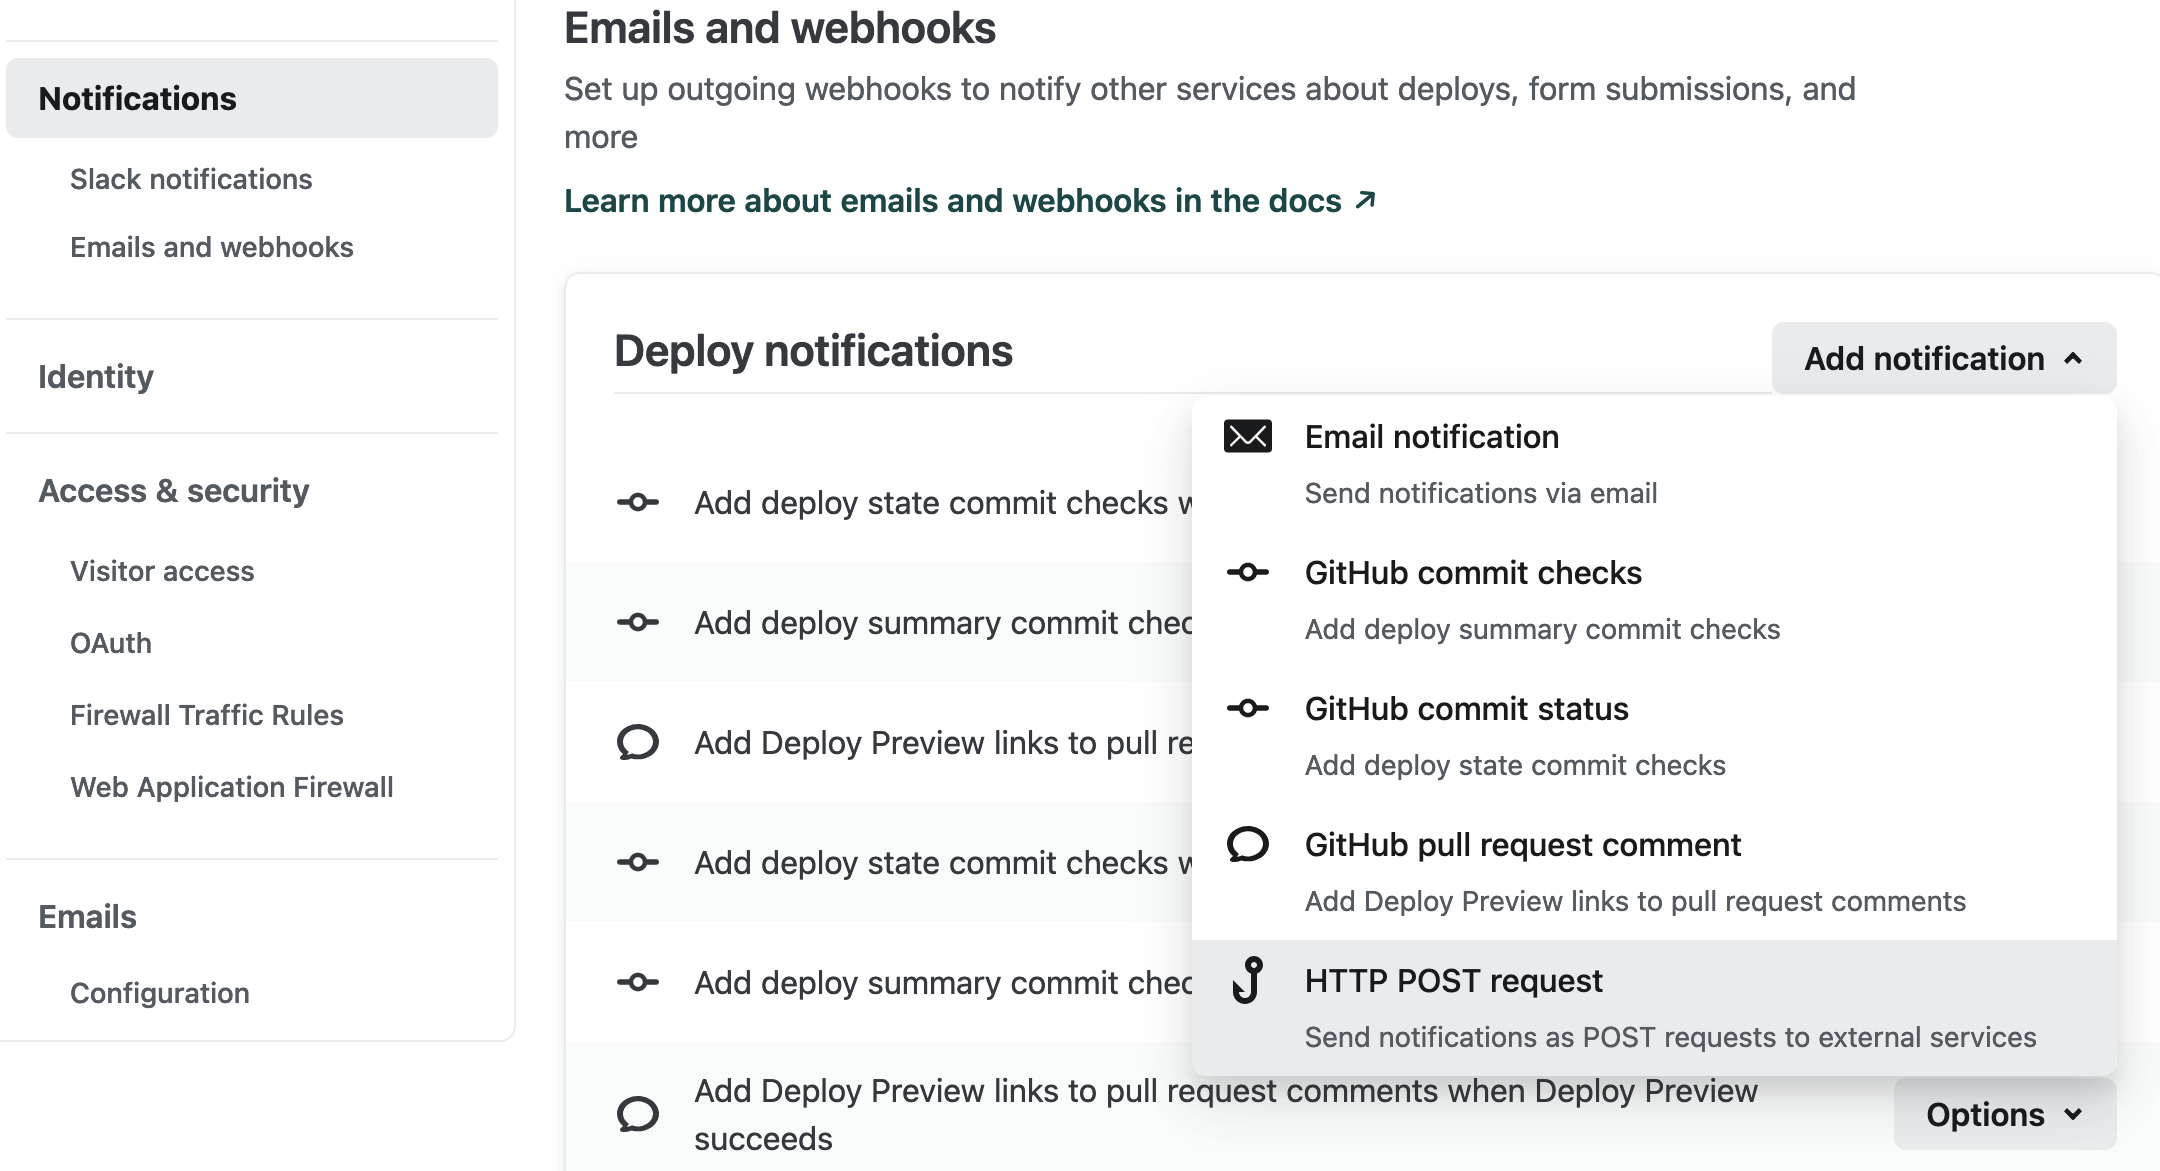
In the Site configuration page for your site at Netlify, go to the Notifications section. There, inside Emails and webhooks, click on Add notification and choose HTTP POST request.
Enter the first deployment hook URL, and then repeat the process for the other two URLs.
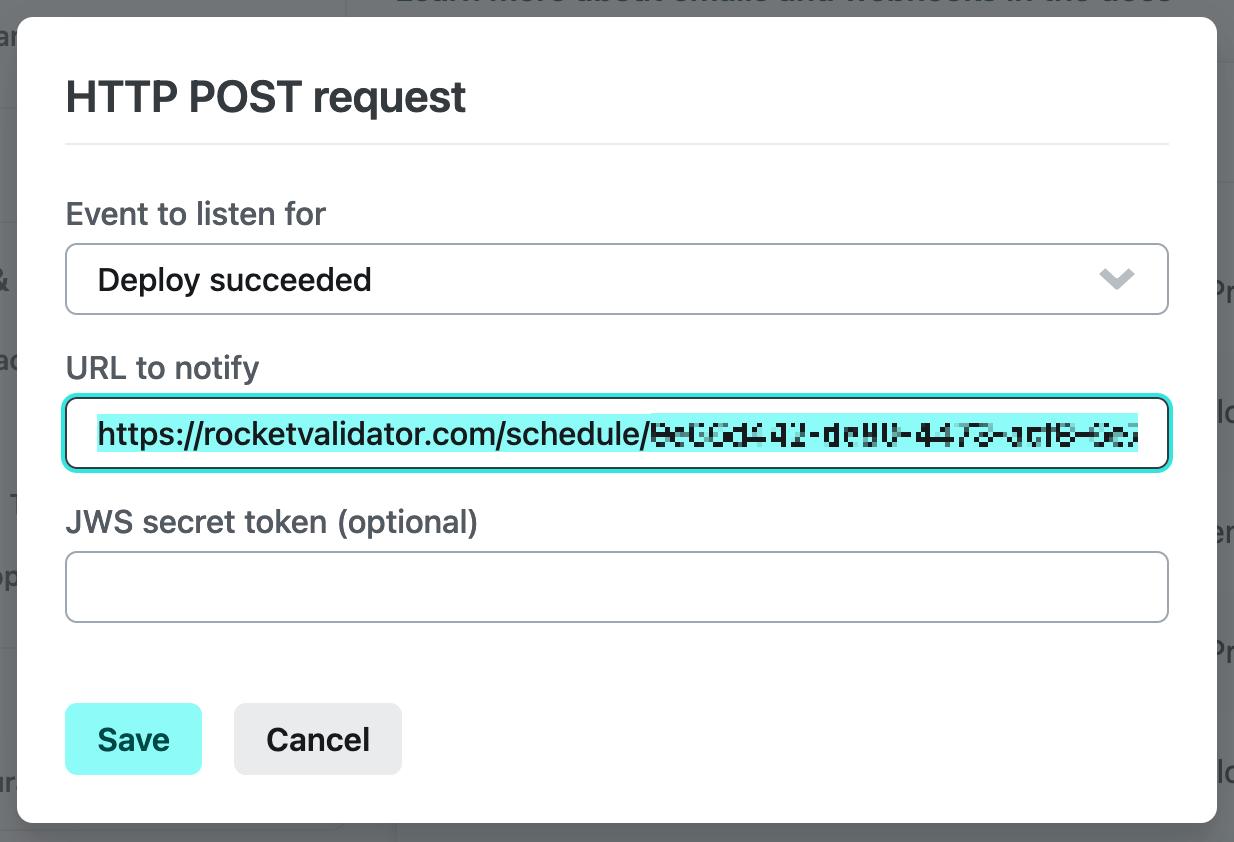
That's it! We've set up the Rocket Validator integration in Netlify! Now, every time we deploy a new version of our site, Netlify will notify Rocket Validator of the deployment via 3 different webhooks, and Rocket Validator will run the related validation reports with the device viewport emulation configured for each schedule.
What we’ve built
In this post we've seen how to set up a continuous integration pipeline for our site, and how to use Rocket Validator's device viewport emulation and deployment hooks features to validate the accessibility of our website across three different device resolutions (800x600, 320x568, and 1440x900). Also, HTML conformance will also be checked on each deployment.
Having this setup means that each time a new version of our site is deployed, Rocket Validator will run a validation report for each schedule, checking the accessibility of our site at the different device resolutions and sending us a detailed report of the results via email.
If any accessibility issues are found, we can fix them and redeploy our site, and Rocket Validator will run the validation reports again on the new version of our site.